Notes and Annotations
mrv2’s notes features provide a quick and easy way to tag media with text comments and on-screen sketches. This allows users to record and share written and visual feedback with colleagues or make annotations for their own use.
Notes can also be useful as empty bookmarks to mark a frame on a media item.
Adding a Note or Sketch
There are three ways to create a note on any frame of a media item. The note is always added to the current (on screen) frame of the on-screen media:
Hit the ‘Ctrl + A’ hotkey, or select the Annotations from the Panel menu or click twice on any of the Drawing Tools.
With a drawing tool selected, start drawing strokes or shapes over the image in the viewer - this will automatically create a note on the frame.
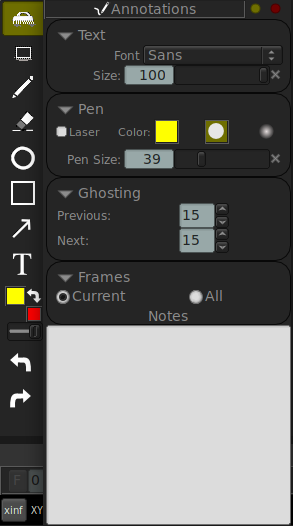
Strokes can be soft or hard, depending on the setting on the Annotation Panel.
On-screen sketches and notes can be attached for a given frame or be added to all frames.
Sketches can be ghosted and the Annotation panel controls how many frames do the ghosting happens both previous to the frame of the annotation and how many frames they remain next to the actual frame of the annotation.
Modifying a Note
Enter your notes text content directly into the Notes display in the Annotation Panel. To delete a note, just select all text and hit Delete. To modify a sketch, you have the arrows of Undo and Redo. You can also use the Eraser tool to partially or totally erase a sketch.
Drawing Annotations
The Drawing Tools box can be shown or hidden with the ‘Shift+F7’ hotkey. mrv2’s drawing tools should be easy to get to grips with - just start drawing strokes, shapes or text captions directly onto the viewer. As noted above, a ‘note’ is always created when you create a new annotation.
Drawings are ‘vector based’ (rather than rasterised pixels) and they are rendered ‘on the fly’ by the graphics card. You can zoom in and out of the viewport and the brush strokes should always render without pixellation. Drawings can extend outside of the image boundaries so you are free to add sketches to the side or above and below the image if preferred. Just remember that if you later export the annotations to a movie file, only the sketches inside the image will be saved.
The ‘Laser’ mode (set on the Annotation Panel) is provided so that you can draw non-persistent strokes that fade until they disappear over a couple of seconds. This can be useful for highlighting an area of the image to colleagues present in a review without you needing to continually erase or undo your strokes.
To enter a text caption, select the ‘Text’ tool, click in the viewport to place the caption and start typing. While still typing, you can click or drag the box around. You can change the font from the Annotation Panel. Once you are happy with the text, you can “paste” it by clicking on the green cross or pressing SHIFT + Enter. If you want to discard it, you can hit Escape key, or clean the text and click on the red cross.